

Palworld 1.0 allows players to customize everything about the world they’re playing in. Depending on the player’s choice on whether they want an easy time, faster progress, or difficulty can influence the pace of the game. The suggestions below will help you balance between the desirable level of comfort and the planned difficulties that the game offers along with providing players with additional options that can be utilized for further personalization.
Best Custom World Settings
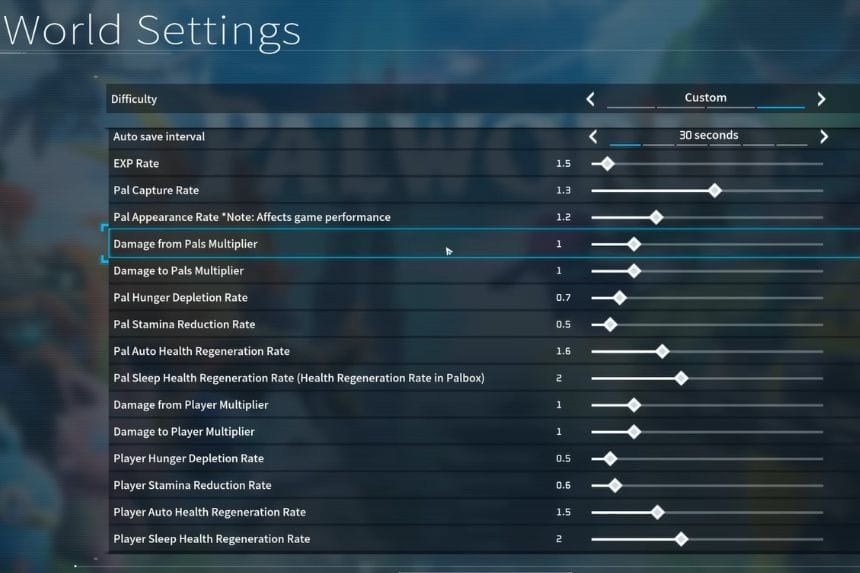
| Setting | Recommended Value |
| Daytime Speed | 0.5 |
| Nighttime Speed | 2 |
| XP Rate | 1.5 |
| Pal Capture Rate | 1.0 – 1.3 |
| Pal Appearance Rate | 1.2 |
| Damage From Pals | 1 |
| Damage To Pals | 1 |
| Pal Hunger Depletion Rate | 0.7 |
| Pal Stamina Reduction Rate | 0.5 |
| Pal Auto Health Regeneration | 1.6 |
| Pal Sleep Health Regeneration | 2 |
| Damage From Player | 1 |
| Damage To Player | 1 |
| Player Hunger Depletion Rate | 0.5 |
| Player Stamina Reduction Rate | 0.5 |
| Player Auto Health Regeneration | 1.5 |
| Player Sleep Health Regeneration | 2 |
| Work Speed Multiplier | 1.8 |
| Structure Deterioration Rate | 0 |
| Grazing Item Production Rate | 2 |
| Gatherable Items Multiplier | 2 |
| Gatherable Object Respawn Interval | 1.5 |
| Dropped Items Multiplier | 1.5 |
| Item Weight Rate | 0.5 |
| Item Decay Rate | 0 |
| Equipment Durability Loss | 0.5 |
| Meteorite and Supplies Drop Interval | 60 minutes |
| Maximum Work Pals | 15 |
| Fast Travel | Enabled |
Gameplay and Progression Settings
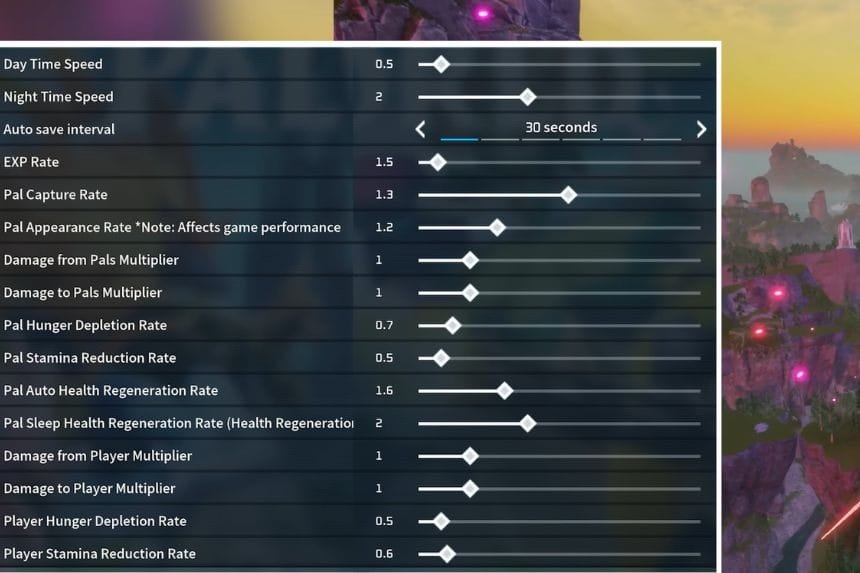
Changing the Daytime Speed to 0.5 will double the length of daytime hours, which would give the player plenty of time to explore, gather resources, and do things before night appears. In a similar manner, raising Nighttime Speed to 2 would cut the duration of the night, thereby minimizing the downtime and allowing the player to get back to daylight quicker.
As for the Auto Save Interval, it all comes down to preference and how often the user wants to save progress. With XP Rate of 1.5, the level-up process receives a nice boost without feeling excessively fast. If the game is being played in a completely new world, this option can be kept close to the default and modified later on in the game.
The Pal Capture Rate measures between 1.0 and 1.3 is balanced. Increasing this level will make capturing Pals easier while reducing the need for creating more powerful Pal Spheres.
The Pal Appearance Rate is responsible for controlling how many Pals appear in the world. A value of 1.2 increases the number of spawned Pals but might be wasteful for those who own lower-end setups since it is much better to leave it on the default value of 1.
For combat purposes, it is advised to keep the values for Damage From Pals, Damage to Pals, Damage From Player, and Damage to Player indices at 1, as that will allow maintaining the balance. However, you will be able to adjust damages if you feel like making the game easier, for instance, raise the damage done by a player.
Pal and Player Quality-of-Life Settings
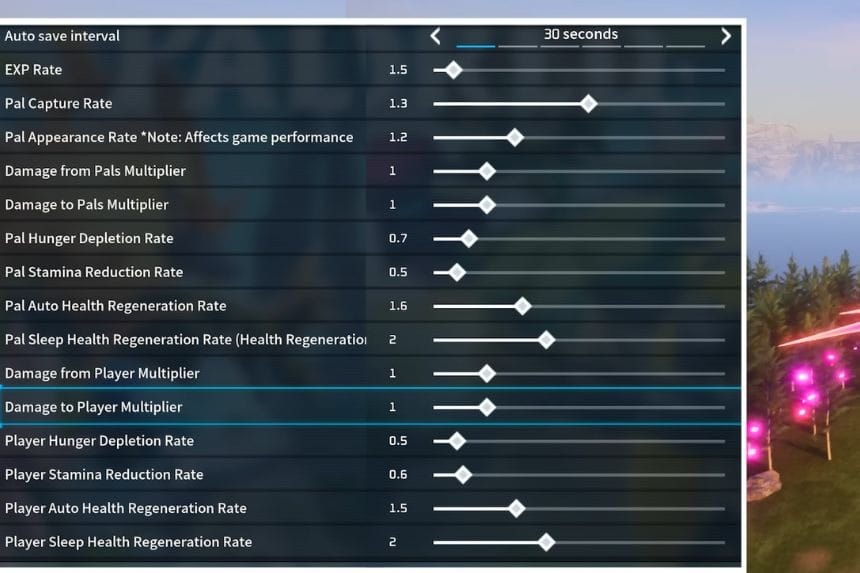
Decreasing to 0.7 in the Player Hunger Depletion Rate means your active Pals will take less time for eating and more time doing tasks around your base. Reducing the Pal Stamina Reduction Rate to 0.5 means you can fly and ride your Pals for longer before they become tired.
An increase to 1.6 in the Player Auto Health Regeneration Rate means your Pals recover faster after combat, and by setting the Pal Sleeping Health Regeneration Rate to be 2, you double the healing time of Pals resting in the Pal Box at any given time.
Modifying the character to reduce the Player Hunger Depletion Rate to 0.5 makes your character less likely to starve. If you set the Player Stamina Reduction Rate to 0.5, your character could travel for quite some time without losing all stamina while running, climbing, and gliding.
Altering the Player Auto Health Regeneration Rate to 1.5 speeds up recovery outside of combat, and setting the Player Sleep Health Regeneration Rate to 2 allows a character to recover health more efficiently while sleeping.
For the Work Speed Multiplier, the optimal value is 1.8, increasing the speed of crafting and production while still giving the advantages to experienced Pals. Higher values bring losses to good workers, while lower values slow down production.
Base, Resource, and Inventory Settings
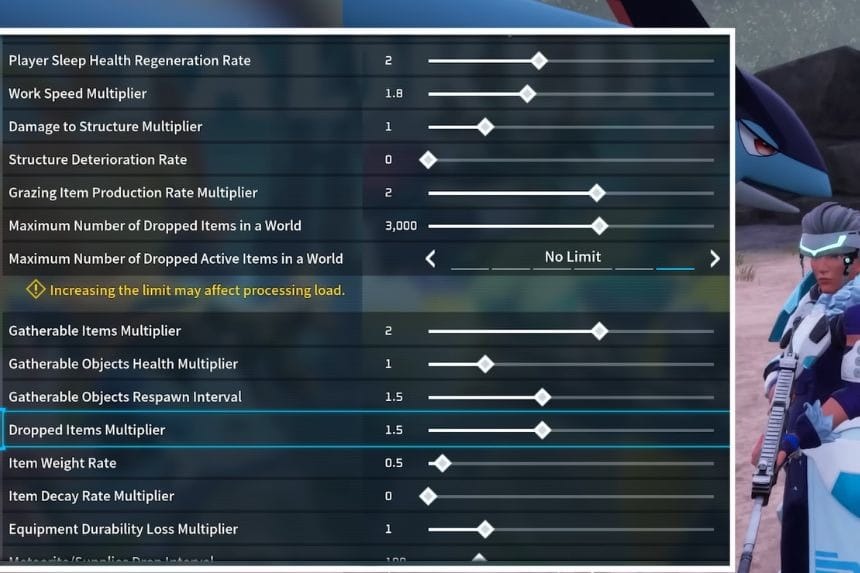
Make sure to keep the Damage to Structure Multiplier on 1. In single-player worlds, keeping the Structure Deterioration Rate on 0 means that buildings will not slowly decay away from the Palbox. You will have an easier time making big and decorative bases.
When you set the Grazing Item Production Rate to a value of 2, your grazing Pals will produce resources like eggs and milk in half the time, allowing you to craft ingredients quickly.
Most single-player worlds work just fine with the default value for Maximum Number Dropped Items of 3,000.
Adjusting the Gatherable Items Multiplier to 2 doubles all resources you get for harvesting trees, ores, and other gathering nodes. Its Gatherable Object Health can be kept at 1, but do not forget to change the Gatherable Object Respawn Interval to 1.5 to have resource points respawn more often.
The Dropped Items Multiplier can be set up to 1.5 so that you will have more loot drops from defeated enemies and Pals so that resource farming is less repetitive.
By modifying the Item Weight Rate to the value of 0.5, you will be able to carry much more resources without becoming encumbered. However, if you do not like the limits imposed by inventory, you can decrease this indicator even more.
Setting the Item Decay Rate to 0 will help you with eliminating food spoilage. If you want to keep food spoilage as one of the elements of survival experience, you can choose 1 or even lower than that, which will speed up the process.
Finally, if you modify the Equipment Durability Loss Multiplier to 0.5, your tools, weapons, and armor will last longer without needing repairs.
World Events and Difficulty Settings
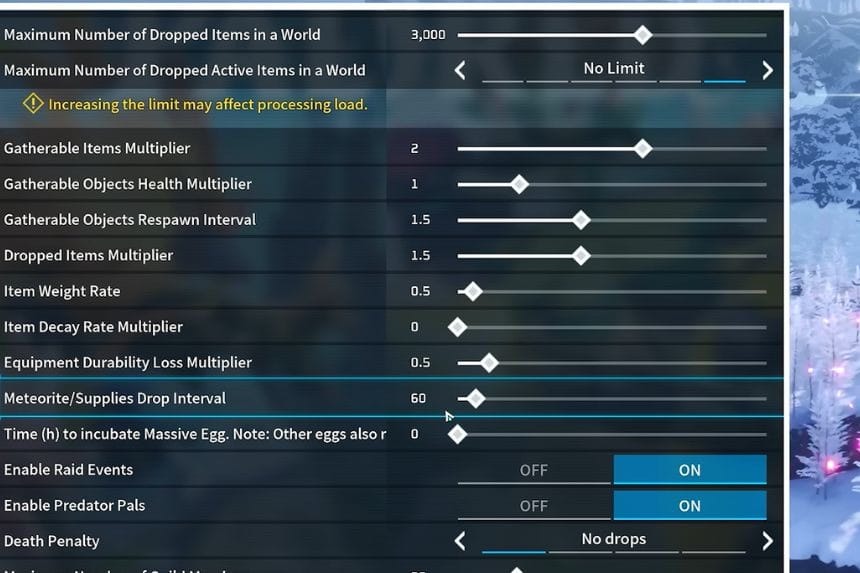
Setting the Meteorite and Supplies Drop Interval to 60 minutes causes these world events to appear roughly once every hour. Players who want them to occur more frequently can reduce the interval to around 30 minutes.
The default Time to Incubate Massive Eggs is one hour, but reducing it to 0 removes the waiting period entirely and allows eggs to hatch instantly.
Whether Raid Events are enabled depends entirely on your preferred playstyle. Keeping them on lets your base come under attack, while disabling them creates a more relaxed building experience. Predator Pals can also be enabled or disabled according to personal preference.
The Death Penalty is another optional setting. Choosing No Drops prevents you from losing your inventory, equipment, or active Pals after dying. If you prefer a more challenging survival experience, you can instead choose to drop your items, keep only equipped gear, or even lose both your inventory and your Pals.
Veteran players looking for a completely different experience can also enable Completely Random for Pal Spawn Mode, allowing any Pal to appear anywhere in the world. To keep these random encounters fair, leaving Wild Pal Levels scaled to the surrounding region helps prevent low-level areas from becoming overwhelmingly difficult.
Remaining Recommended Settings
Leave the Maximum Number of Work Pals at a Base at 15 and keep the Maximum Number of Structures unlimited unless you’re playing on a dedicated multiplayer server with different requirements.
Finally, leave Fast Travel enabled and unrestricted so every fast travel point across the map remains available. Since nearly every custom world setting can be changed later, don’t hesitate to fine-tune these recommendations as you progress through Palworld and discover the playstyle that suits you best.