Fracture is a complex set of zombie waves found in Black Ops 7 Zombies. This guide will give you the best steps and strategies to help you complete the glitch fracture on your own or with your team, while earning multiple rewards in the process.
Rewards for Completing the Glitch Fracture
After finishing the Virus Injection Glitch Fracture mission, players receive a good number of rewards. By completing the glitch and earning victory over time as Verac, Zavvery or Hurdo, they will also unlock skins for each operator.
However, only after completing the glitch with a particular operator will players be able to obtain the Brain Case weapon camo. Completing the glitch with those three will earn them the Neon Gallows animated weapon camo.
In addition, if you successfully finish the Glitch Fracture on your own, you receive a Fever Dream Dark Ops Calling Card as part of your reward. There are additional dark ops calling cards tied to completing the Glitch Fracture, but their details are not confirmed yet. If this is your first time completing the Glitch Fracture, you will receive the Operation Broken Mirror reward as well.
Best Loadout for Solo Play
For smooth play through the Virus Injection Glitch Fracture, if you are a solo player, the ideal loadout (weapons, attachments, and perks) would be this:
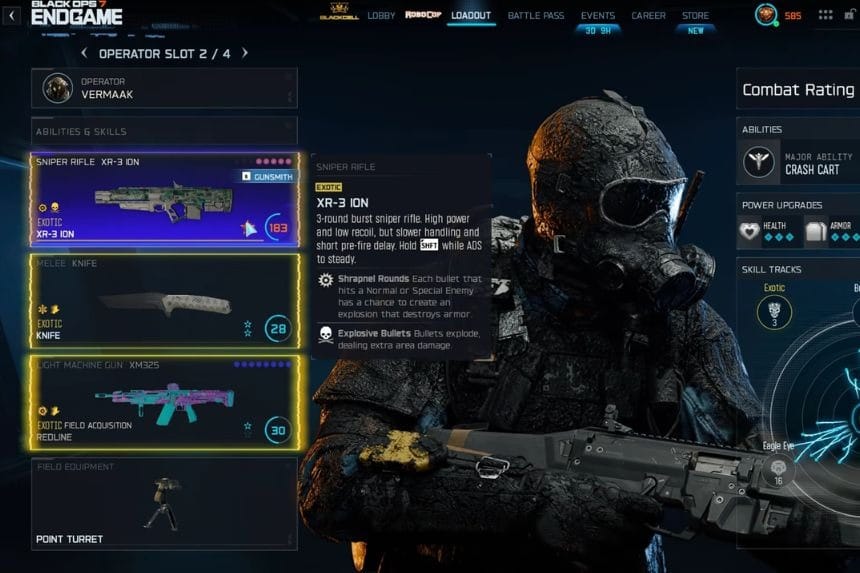
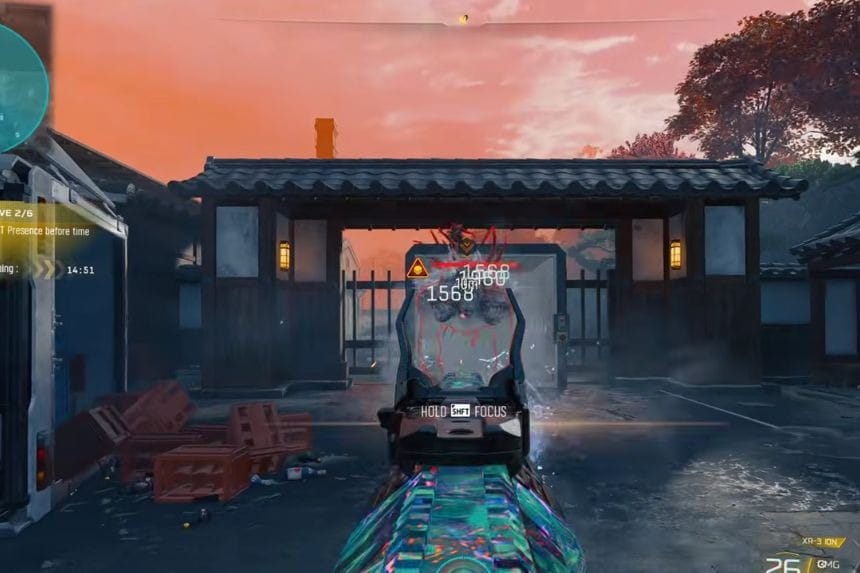
Weapon: XR3 Ion functioned very well in Season 3 Reloaded mode. XR3 has explosive bullets as well as shrapnel options. Therefore, it will make clearing large groups of enemies easier.
Skills
- Bulldozer: This skill reduces explosive damage, helping you stay alive in tough situations.
- Eagle Eye: Increases critical damage with the XR3 Ion, boosting your offensive capabilities.
- Warband: Automatically replaces and spawns allies, which is useful for handling large waves of enemies.
- Exotic Skill: Conjuration is a solid choice, allowing you to kill enemies while you focus on other tasks.
- Nightmare Skill: Frost Vortex pulls enemies together, making your explosive bullets hit multiple targets at once.
- Utility Items: Always carry a Crash Cart for self-revival, as playing solo means you’ll need that extra safety net. The Grappling Hook is also essential for maneuvering around and escaping tight situations.
Wave Breakdown and Objectives
The Virus Injection Glitch Fracture will consist of six total waves with many different goals and expected difficulties. Below are some descriptions of what Waves 1-6 will entail.
- Wave 1: The first wave involves destroying power cores located within a number of rectangular boxes throughout the area. Identifying these cores will not be too difficult due to their glow, and the task is not significantly challenging (in that there is sufficient time for the task, provided the player is able to complete his/her respective task within the time constraints of that Wave).
- Wave 2: During this wave, you will face off against a Mega Abomination (Mini-Boss) accompanied by some small enemies to take your focus off the Mini-Boss. There is a time limit for this wave as well; however, it’s doable.
- Wave 3: In this wave, you will have to protect the Rhino while he travels along a ruined highway. The Rhino only has a small amount of health and the enemies will attempt to destroy him; therefore, it is important to stay inside the Blue Circle (keep the Rhino moving). After reaching his destination, all enemies will clear and you will have a short break.
- Wave 4: The rhino you’ve saved will turn on you, forcing you to fight it while also fighting a few other enemies that will spawn around it. With the right loadout, this can be a manageable fight because you can still restock on ammo and self-revives during the encounter.
- Wave 5: Next, you’ll go to the aircraft carrier from Black Ops 7 Campaign and face off against a 45-enemy wave. The area will have a moving circle that you must stay inside while killing all the enemies. There will also be ammo crates and self-revives throughout this entire wave.
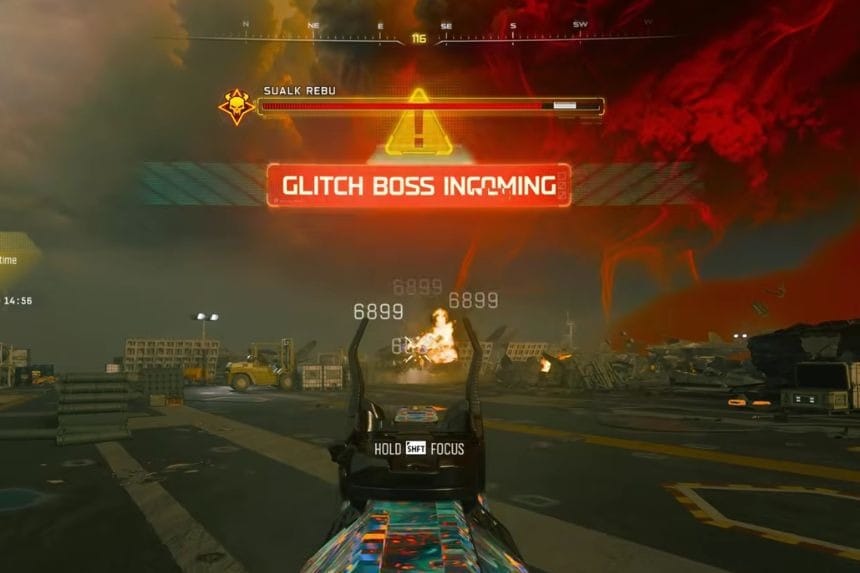
- Wave 6: The final wave pits you against Sulk Rubu, the Mech Strike Boss. Sulk Rubu has two forms, one in a mech suit and the other as a flying Iron Man-like version. Be sure to keep moving and avoid his attacks, especially the ground slam, which can instantly knock you out. He also shields himself with a ballistic shield, which you’ll need to damage to bring him down.