Chapter 6 of DOOM: The Dark Ages maintains the acceleration, mixing frantic demon-killing with cleverly crafted environmental puzzles and secret-hunting. The chapter, full of gruesome combat and narrative buildup, also features some of the most intricate and rewarding secrets in the game. Among them are four Gold Chests, each demanding a keen eye, awareness of the environment, and combat skills to obtain.
Gold Chests are precious treasures that give the player stacks of gold utilised to upgrade gear, buy upgrades, and level up the Doom Slayer for more challenging battles to come. Below is a step-by-step guide on how to find and claim all four Gold Chests in Chapter 6.
Read More: All Wolf Statue Locations in The Kar’Thul Marshes – DOOM: The Dark Ages
What Are Gold Chests in DOOM: The Dark Ages?
Gold Chests are secret items scattered throughout the different chapters of DOOM: The Dark Ages. They’re usually hidden away in secret rooms or hard-to-access places and require environmental manipulation or strategic exploration to access.
Each chest gives you a hoard of gold, which is used to enhance your Slayer’s arsenal, open up new equipment, or boost your survivability in the increasingly ferocious fights that lie ahead later in the campaign. Although not all chapters contain them, those that do generally provide one or more, some cleverly concealed, some behind elite demons.
Read More: DOOM: The Dark Ages Fire or Flaming Door Puzzle Solution
How to Find All Gold Chests in Siege Part 1 – Chapter 6?
In DOOM: The Dark Ages, gold chests are an essential resource that rewards the player with gold, which is utilised for unlocking upgrades and buying new equipment. Not all chapters feature them, but in missions where they do, they’re usually hidden behind environmental puzzles, combat gauntlets, or tricky platforming challenges. Chapter 6 has five Gold Chests worth searching for.
Gold Chest 1 Location
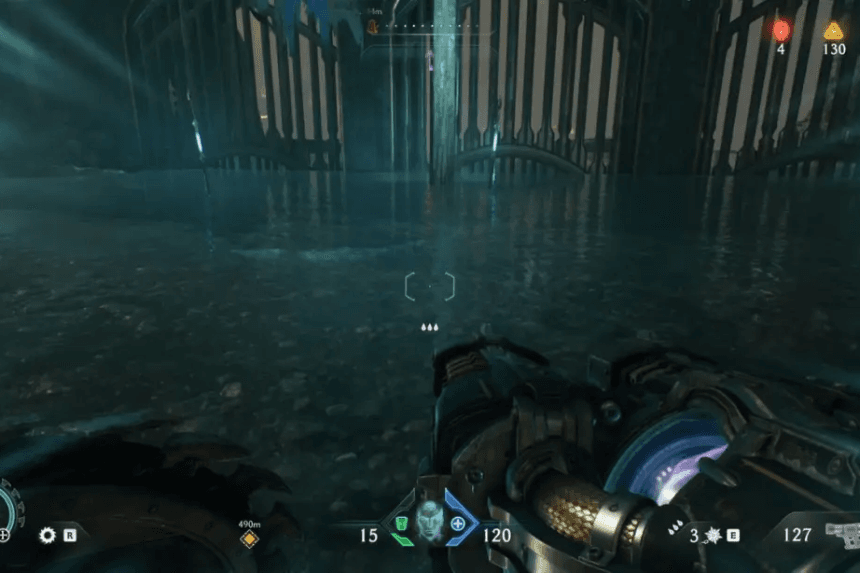
Proceed to the arena located just after the second gore portal and collect the gold bars lying on the floor. This will initiate a surprise ambush, and a Vagary demon will be spawned.


- After defeating the foe, a blue teleporter on the right side of the room becomes accessible. Enter it to unlock the third secret region of the map.
- Within this hidden room, glance upwards—you should see a blue energy node installed within the ceiling. Activate it using your Shield Throw.
- This opens up a door in close proximity. Enter and grab yet another collection of gold bars. In front of you lies a breakable wall—blow it up with a Shield Charge.
- You’ll then encounter a large box positioned awkwardly. Shield Charge into it to slide it into alignment with a nearby wall and ledge.
- Climb up using the box and wall scramble. At the top, you’ll find a switch that opens the exit gate, but you haven’t activated it yet.
- To the right of the switch, there is a fragile wall. Protect Charge through it to fall into the secret room that has the Gold Chest.
- Destroy the red-hot metal cross beside the chest to have another shortcut. Climb up the scramble wall and then proceed through the gate that you unlocked before.
Gold Chest 2 Location
Search a sealed gate that is being guarded by three Spiderdemons opposite the artillery cannon, so you have to kill all three Spiderdemons to open the gate. Pass through the gate and prepare for an ambush. A Hellknight swarm and minor demons will assault you.


- When cleared, a blue teleporter is activated. Enter it.
- You’ll find yourself in a new ritual site where demon cultists are activating the third gore portal.
- Make your way through combat and puzzles until you come to a room that has a lion statue.
- Here on this upper level, there is a Life Sigil collectable. Before heading to the next gate, take time to investigate the room with the hot metal cross.
- Inspect the rear of the room—you’ll find a breakable wall. Shatter it to access Secret Area 4 and a stack of gold.
- Once you’ve looted, head back to the room and continue with your goals. Soon thereafter, you’ll unlock the Chain Shot weapon.
- As the gate ahead opens, it will lead directly to the second Gold Chest—grab it before continuing.
Gold Chest 3 Location
After dealing with the third gore portal, take the right path instead of heading straight. This brings you to an empty battlefield where an Atlan Mech and a Titan battle in the distance.


- After clearing the area, go to the eastern part of the arena, where you’ll see a cave entrance with two blue torches on either side.
- In the cave, track the path of gold bars on the floor. You’ll find a purple-locked gate; this one remains inaccessible for now.
- Look up to the north corner and spot a Green Flesh Node on the ceiling. Hit it with a Shield Throw to activate a lift.
- Jump onto the metal platform in the centre of the room. The Slayer’s weight lowers it, unlocking another door ahead.
- Enter the door and collect more gold. Climb the scramble wall to reach a long hallway. Two turrets for fire-type rotating machines slowly fire projectiles here.
- As you proceed, turn left at the exit and use the fire charge through a wooden wall to reveal a secret stack of gold.
- When you get outside the cave, head back down a long line of golden bars on the ground to the right. This trail leads directly into Secret Area #5 and the third Gold Chest.
Gold Chest 4 Location
Enter the fifth Gore Portal arena and prepare for a large ambush. This time, a Cyberdemon will join the fray. After the terrain is cleared, there is a teleporter that leads to the last combat puzzle of the level.


- Ahead is the last gore portal, but it’s gated by a multi-step puzzle. First, go right, and Shield Charge through a wall that can be destroyed, and you will be in a room with a hot metal cross. Chop it down to trigger a scramble wall.
- Step on the box to the left, and jump to a second box to the right. A slender walkway along the golden bars appears before you. Walk in a direction, continuing along a wiggling stairway.
- Proceed to the original chamber, mount the box a second time, and peer up to see a Green Flesh Node at the top.
- Hit the node and jump onto the extended bridge over the chamber. This will allow you to access and grab the first lever, which opens a metal gate below.
- Fall through the gate, and you will find the last Gold Chest of the chapter standing by to be collected.
Gold Chest 5 Location


Go back to the greyed-out arena where the Mech and Titan fight is taking place, and the Vagary’ll ambush you. Move left after defeating your enemy, and you’ll find a gold chest right next to the Titan and the Mech.
