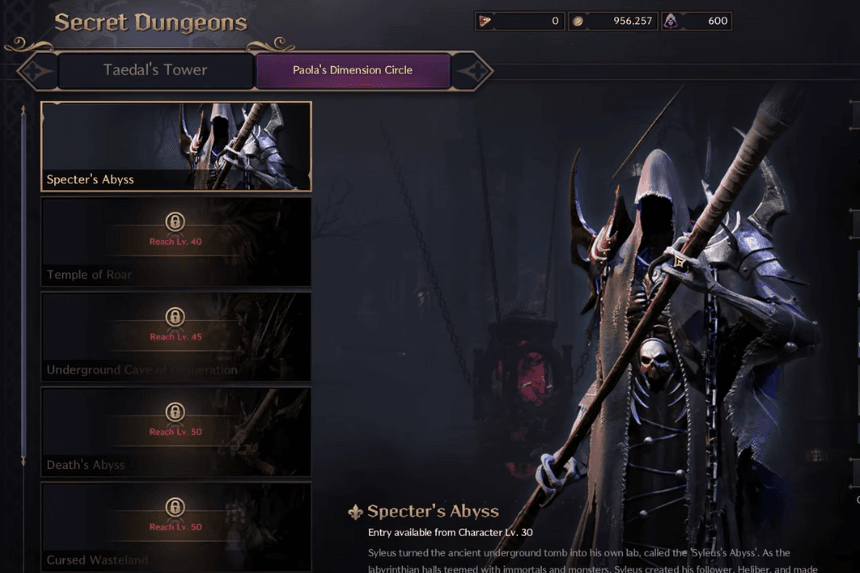
Specter’s Abyss is the first big challenge you’ll face in Throne And Liberty. It’s a dungeon you can start when you reach level 20 and have decent gear. This is where you’ll really see how well you and your team can work together, and if your gear is up to par for the fight. Specter’s Abyss has three parts, each with its own boss fight that gets tougher. Before you go in, make sure you’re ready. I’ll tell you what you need to know to beat each boss, and I’ll give you a detailed guide on how to take down Helibel, the big bad at the end.
Preparation for Specter’s Abyss
To enter Specter’s Abyss, you need to be level 20 and have a gear score of 600. You can level up by doing the main story and side quests. To increase your gear score, you can upgrade your gear and skills. Start by making some basic armor and then improving it. Spend your skill books on the skills you use most often.
Party Composition
This game is like a traditional MMO, so you’ll need a tank and a healer, even now. There are some attacks that hit really hard, and a healer can keep everyone alive. A tank is also important for making some of the fights easier.
You can find a group to play with using the party finder. If you have friends, decide who will be the tank, healer, and damage dealers. Use all those potions and attack boosts you’ve collected – don’t save them for later. They can help a lot, especially if you’re having trouble dealing enough damage.
Specter’s Abyss Dungeon Guide
You’ll fight different types of enemies called Arkeum Legion soldiers, like archers, wizards, and knights. You can also find Moonstone gems scattered around, but only one person can pick them up at a time. There are three big boss fights in this dungeon.
First Mini-Boss
The first room is pretty easy. There are a few basic enemies and a boss called an Arbiter. To beat the Arbiters, use a skill that stuns them to stop their wipe attack. You’ll hear them yell when they’re about to do it. After the first room, you’ll face the first mini-boss, the Shadowmancer.
The Shadowmancer is easier than the one you’ll fight later. It only grabs one player at a time. To stop this, just use a skill that stuns it. Watch out for when the boss says something and starts lifting a player up.
Second Mini-Boss
The next part of the dungeon has two rooms with levers in the middle. You need to pull both levers to open the door to the second mini-boss. Once you’re inside, you’ll fight the Riot Squad Captain.
The Riot Squad Captain is pretty easy. When he yells “Die!”, a blue bubble appears around him. Keep hitting him until the bubble goes away, then stun him to stop his attack. Once you beat him, go to the final boss room to fight Helibel.
Final Boss – Heliber
To start the fight with Helibel, you need to interact with a prison in the middle of the room. Helibel has a few attacks. One of his most common attacks is a big cone-shaped blast that hits whoever he’s targeting. It does a lot of damage, so try to avoid it by having your tank face the boss away from the rest of the group.
Helibel can also teleport to the player who’s farthest away, so be careful where you stand as a group. Another attack to watch out for is called Fury Attack. A purple circle appears on the boss when he’s going to do it. This attack hits everyone around him, so make sure to block it! Helibel will also target one player and put a dark bubble around them. Everyone needs to stand inside the bubble to avoid getting wiped out. After doing this a few times, you’ll beat the boss and finish the dungeon.
Items Dropped
| Items | Number of Drops |
| Strike Battlefield Sword | 1 |
| Abyssal Witch’s Staff | 1 |
| Dark Warrior’s Visor | 1 |
| Flying Dragon Claw Leather Boots | 1 |
| Frost Barrier Magic Boots | 1 |
| Training Dew: 10,000 | 1 |
| Mana Blood | 1 |
| Quality Polished Crystal | 1 |
| Enraged Quick Sniper’s Crossbow | 1 |
| Deadly Stance Plate Boots | 1 |
| Moonlight Grace Leather Boots | 1 |
| Grace of Mother Nature Prayer Shoes | 1 |
| Deadly Strike Iron Gloves | 1 |
| Rare Polished Crystal | 1 |
| Fermented Rotein | 1 |
| 500 Abyssal Contract Token Points | 1 |


