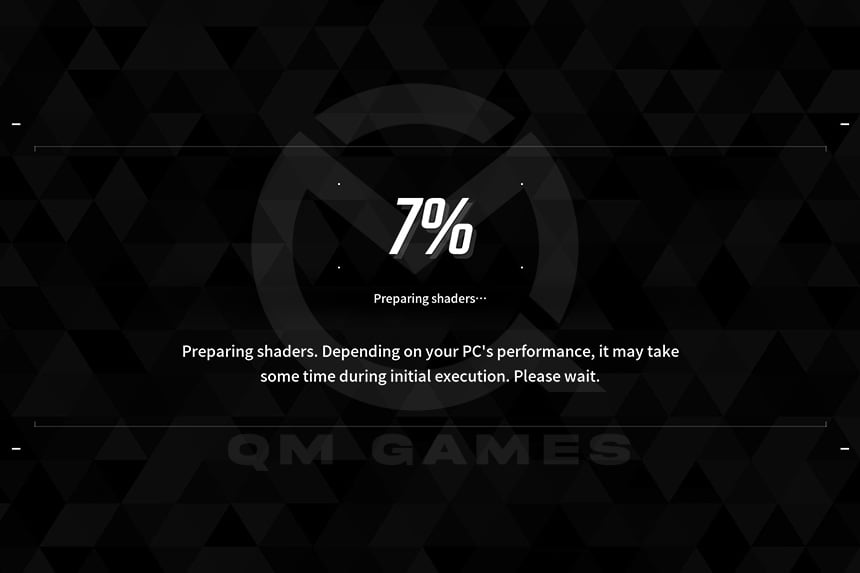
The First Descendant has had a great launch in terms of the number of concurrent players on Steam, but the game is very buggy even after a prolonged beta that has extended more than a year. One of the main issues reported by players is the The First Descendant Crash at Shader Loading. The other issue is that the game shutters at lot. The game crashes many times as it’s compiling the shaders. If you have the same issue, we have a bunch of fixes that can resolve the issue for you.
Fix The First Descendant Shader Crash
The First Descendant Shader Crash is the most common issue with Unreal Engine 5 games next to the memory error, the UE5 engine may not be to blame entirely. Having said that, these are the best fixes to resolve the issue.
Fix for Intel 13th and 14th Gen CPUs
If you own an intel 13th and 14th gen CPUs, then the The First Descendant Shader Crash could be due to the CPU generation you own. This is an known issue. The shader crash happens only in UE games and it is because the CPU draws too much power which is provided by the motherboard by default. To fix the issue, get the power limits to intel’s intended defaults.
T do this, lower the per core tuning in Intel CPUs. For this, you will need to download the Intel Extreme Tuning Utility. Once you have downloaded and installed the software, go to the “Performance Core Ratio” and lower it from 55x to 54x.
Update the BIOS
As the motherboard is supplying too much power to the CPU (talked in the above fix), the motherboard manufacturer may have issued firmware updates that resolves this issue. Update the BIOS software and the issue may resolve on it’s own.
Change Power Settings to Balanced
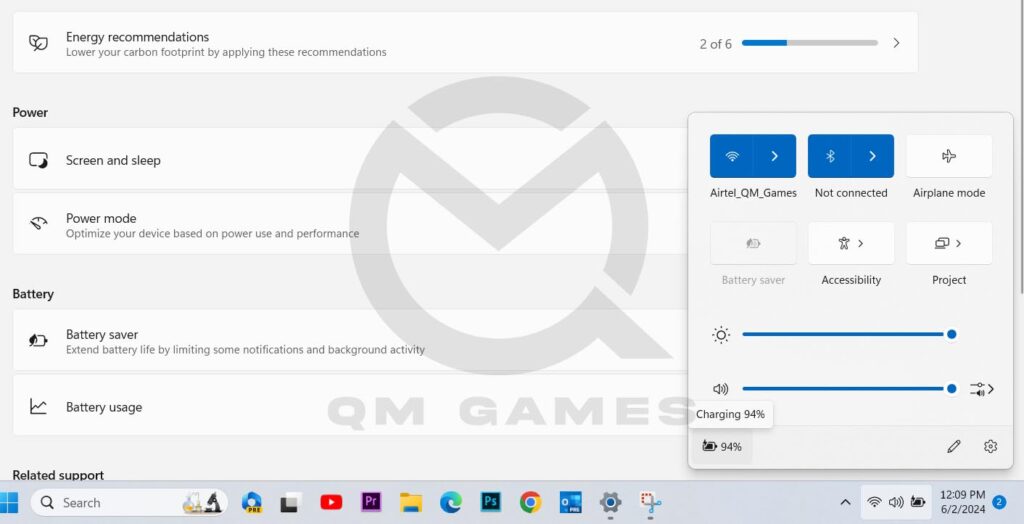
Changing the power settings is another way to limit the supply of power to the CPU. Go to the Windows Power Settings and set the Power Settings to Balanced or Performance. Go to Windows Settings > System > Power > Power Mode and change the settings.
Do not Overclock/ Underclock the CPU
Overclocking is an main issue with UE5 games as we have seen in so many cases. Ensure that your CPU is not overclocked. Many times, the CPU comes overclocked by default. In that case, underclock the GPU and it should allow you to play the game without the shader crash.
Limit the FPS

The First Descendant Crash at Shader Loading mainly occurs due to CPU or the GPU being unstable. Limiting the game’s FPS while shader compiling may make the system more stable. Once the game has launched, you can go into settings and increase the FPS. At this point the crash should not occur.
Update the GPU Drivers
To update the GPU driver, we suggest that you use the Use Nvidia Cleanup Tool to remove all elements of all Nvidia software and download and install everything from scratch including the GeForce Experience. If you want you can skip installing the Nvidia Cleanup Tool, but when installing the latest GPU driver, choose to perform a clean install.
Turn Off Ray Tracing

Ray Tracing is a great technology but it strains the GPU and when you have an unoptimized games, it can create severe issues. Turn off Ray Tracing and the game should work for you without the shader crash.
Turn Game Settings to Minimal, Reduce Screen Resolution, Increase when In City
So, the next fix you can try to bypass the shader compilation crash is to turn all game settings to the bare minimal, reduce the screen resolution a bit and when the game loads in and you are in the city or in the quest, set everything back to the way you want it.
Increase the Virtual Memory
The next fix you can try to resolve this error is to increase the size of the virtual memory. Here are the steps you can follow to replicate the fix.
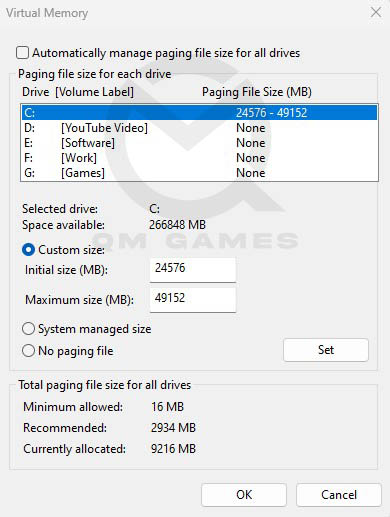
- In the Windows Search, type and click on View Advanced System Settings
- In Advanced, under Performance, click on Settings
- Go to the Advanced tab and click on Change under Virtual Memory
- Uncheck Automatically manage paging file size for all drives
- Check Custom Size and enter the below values
- Initial Size (MB) – 1.5 X Total RAM (For 16 GB RAM, 16 x 1024 MB = 16,384 MB, 16,384 MB x 1.5 = 24,576 MB)
- Maximum Size (MB) – 3 X Total RAM (For 16 GB RAM, 16 x 1024 = 16, 384 MB, 16,384 MB x 3 = 49,152 MB)
- Click on Set and OK.
These are all the fixes you can try to resolve the First Descendant Crash at Shader Loading – Shader Crash. i hope the guide was useful. If the guide helped, please let us know in the comments.
