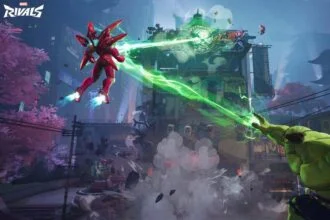
Marvel Rivals is the latest superhero team-based PVP shooter game developed by NetEase Games and Marvel Entertainment and released for PC, macOS, PS5, and Xbox Series X|S. The heroes of this game look good and the maps are impressive but still, some players are not enjoying the game to the fullest as they are experiencing lagging, stuttering, crashing, and low FPS issues so this guide has covered all possible methods to resolve these issues – So, do not miss to check out this complete guide which will help to boost FPS (Frames Per Seconds).
- How to Fix Marvel Rivals Lagging, Stuttering, and Low FPS – Boost FPS Guide
- 1. Changing In-Game Settings
- 2. Disabling Game Bar
- 3. Using ISLC to Clear Memory Standby List
- 4. Disable Power Throttling (Laptop Users)
- 5. Turn ON Game Mode
- 6. Turning on hardware-accelerated GPU Scheduling & Optimizations for Windowed Games
- 7. Use Exit Lag Software to Boost FPS and Reduce Lag
- 8. Adjusting Appearance & Performance
- 9. Increase Virtual Memory
- 10. Change Compatibility Settings
- 11. Enable Clean Boot
- 12. Create Registry Backup and System Restore Point
- 13. Download our Custom FPS Pack
How to Fix Marvel Rivals Lagging, Stuttering, and Low FPS – Boost FPS Guide
In this comprehensive guide, we are going to walk you through all potential methods to fix several issues with the game, especially lagging, stuttering, and low FPS.
1. Changing In-Game Settings
The first and very quick step to fix this problem is to simply change in-game settings to improve gaming performance. Here is what we suggest:
– Run the game in Windowed Fullscreen
– Set the Texture Anisotropy to 4x
– Disable Depth of Field
– Disable Wind Impulse
– Disable Motion Blur
– Disable Film Grain
– Disable Chromatic Aberration
2. Disabling Game Bar
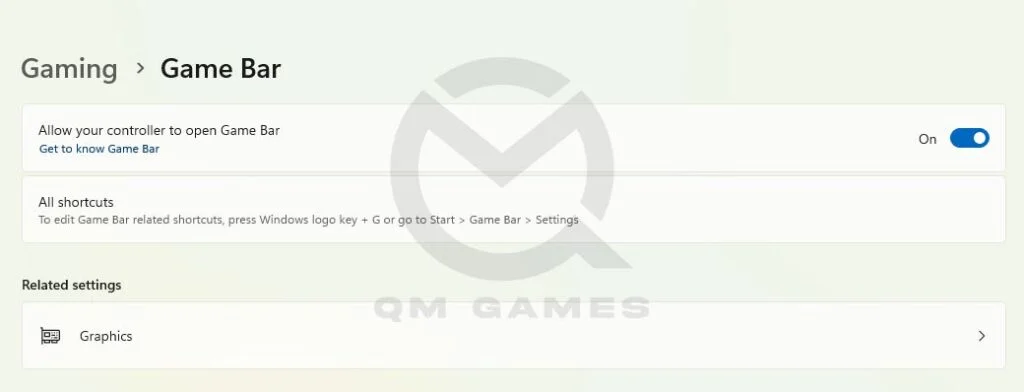
If the game bar is running in the background, it can consume a lot of resources so try disabling it. This will help to increase your gaming performance. Here is how you can do it:
– Press Windows key + I to go into Settings
– Then, go into Gaming >> Game Bar
– Disable the Game Bar
3. Using ISLC to Clear Memory Standby List
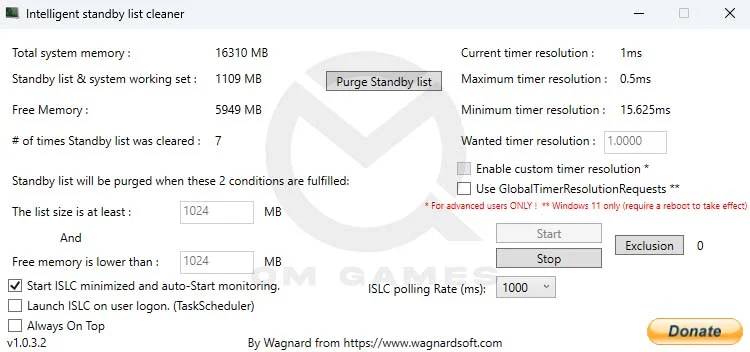
The next method we suggest is to use ISLC to clear the memory standby list. If you have no idea about it, ISLC (Intelligent Standby List Cleaner) is a free tool that can help to manage and clear the memory standby list on a Windows system. You simply need to install it on your system and run it with its default settings.
4. Disable Power Throttling (Laptop Users)
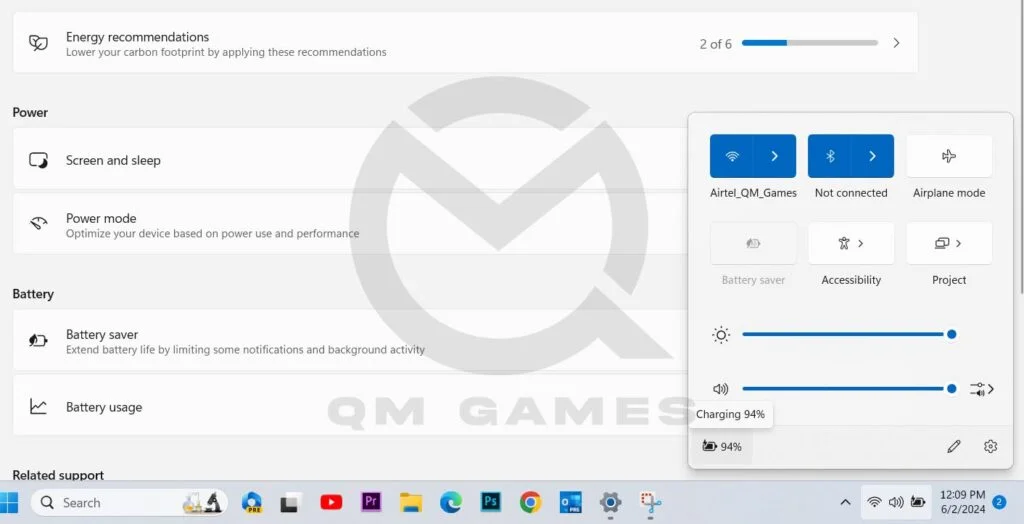
This method will only apply to laptops. If you are still experiencing lagging, stuttering, and low fps issues in Marvel Rivals, try disabling power throttling on your system. For this: Click on the Battery Icon in the tray bar >> click on the charging icon >> Power Mode >> Set for Best Performance.
5. Turn ON Game Mode
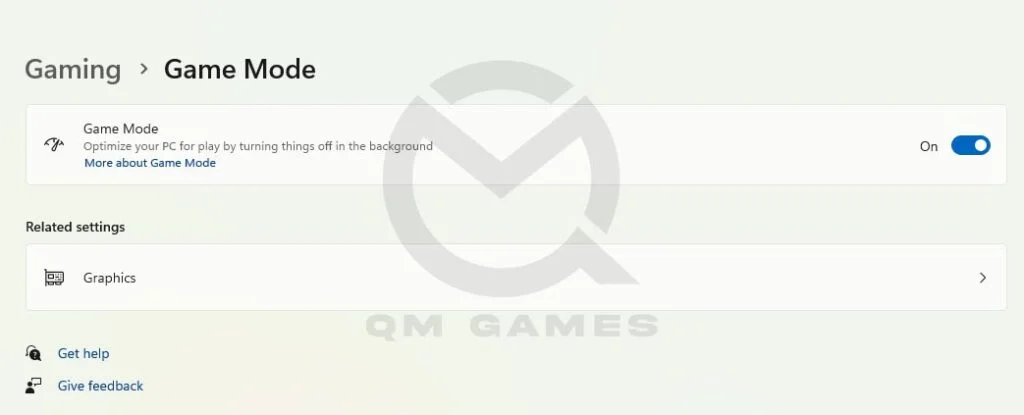
Game mode on your PC can help to enhance the overall gaming experience so it is always advisable to turn it ON while playing online games. Follow these steps:
– Press Windows key + I to go into Settings
– Then, go into Gaming >> Game Mode
– Turn ON the Game Mode
6. Turning on hardware-accelerated GPU Scheduling & Optimizations for Windowed Games
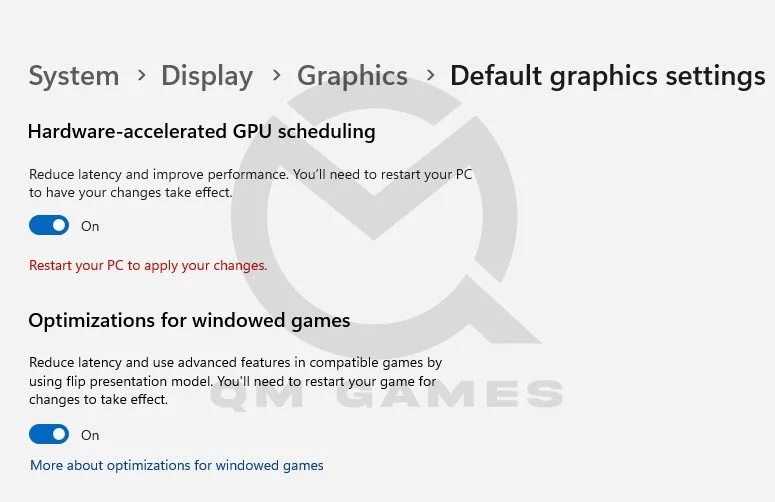
This method will help to optimize your PC to provide the best gaming performance. Here is how you can do it manually:
– Go to Settings on your PC by pressing Windows + I keys
– Go into Gaming >> Game Mode >> Graphics
– Click on Browse under Custom options for apps and add the game executable to the list
– Click on Options on the Marvel Rivals file and choose High-Performance GPU
– Next, click on Change default graphics settings at the top under Default settings
– Turn on hardware-accelerated GPU Scheduling & Optimizations for Widowed Games
Once done, make sure to restart your PC once.
7. Use Exit Lag Software to Boost FPS and Reduce Lag
ExitLag is powerful software that helps to improve FPS and reduce lagging issues in online games including Marvel Rivals. The main role of this tool is to optimize connection routes to game servers that eventually offer a smoother gaming experience. Click here to download this software.
8. Adjusting Appearance & Performance
Windows offers several visual effects such as animations and shadows which can consume system resources. By adjusting appearance and performance, the game starts performing better. Here is how you can do it:
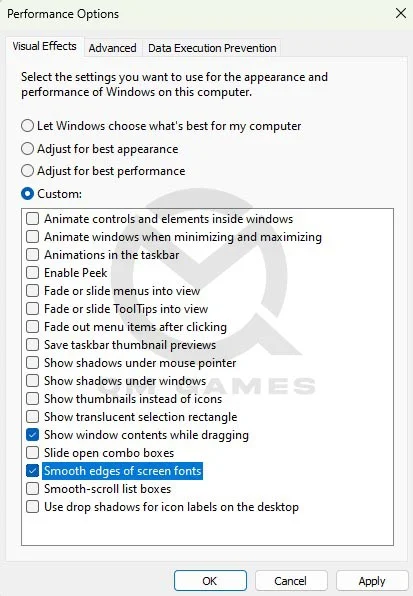
– Go to the Windows Search, type and open Adjust the appearance and performance for Windows
– Turn ON Adjust for best performance
– Now check Smooth Edges of Screen Fonts and Show Window Content While Dragging (Well, if you turn OFF both of these options, your OS may work weirdly. So, so it is a good idea to test all these options to check which ones matter to you and disable the rest).
– Once done, save the changes.
9. Increase Virtual Memory
Additionally, we also suggest increasing the virtual memory of your system because sometimes, your system runs out of physical RAM, and increasing it virtually can help boost FPS. Follow these steps:
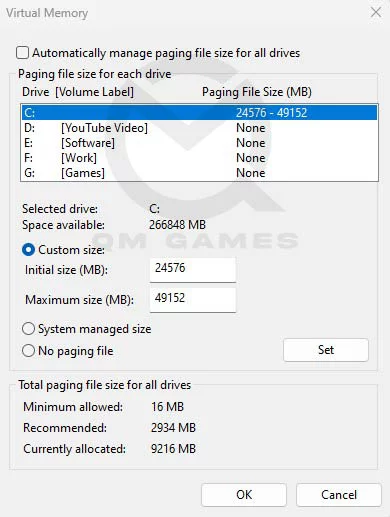
– In Windows Search, type and click on View Advanced System Settings
– In Advanced, under Performance, click on Settings
– Go to the Advanced tab and click on Change under Virtual Memory
– Uncheck Automatically manage paging file size for all drives
– Check Custom Size and enter values based on your RAM
Initial Size (MB) – 1.5 X Total RAM (For 16 GB RAM, 16 x 1024 MB = 16,384 MB, 16,384 MB x 1.5 = 24,576 MB)
Maximum Size (MB) – 3 X Total RAM (For 16 GB RAM, 16 x 1024 = 16, 384 MB, 16,384 MB x 3 = 49,152 MB)
– Once done, click on Set and then Ok
10. Change Compatibility Settings
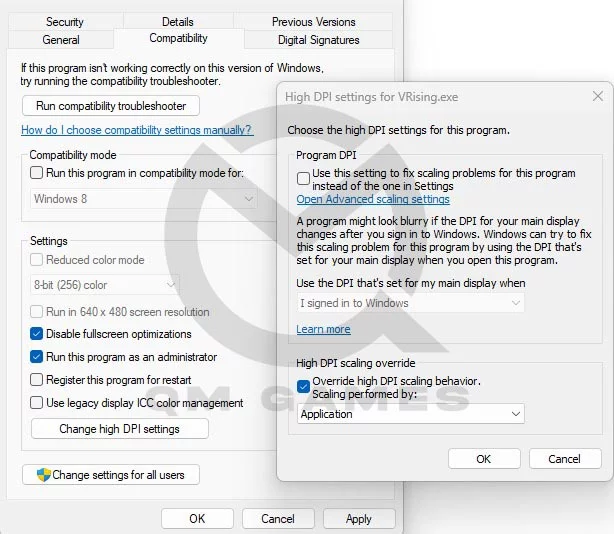
Changing compatibility settings can help to improve the performance and stability of the games. Here is how you can do it:
– Go to the Game Settings on Steam >> Installed Files >> Browse
– Right-click on the executable (.exe) file and choose Properties
– Then, go to the Compatibility tab
– Put a check on Disable fullscreen optimizations and (optional – Run this program as an administrator)
– Click on Change high DPI settings
– Put a check on Override high DPI scaling behavior. Scaling performed by: Application
– At last, save the changes.
11. Enable Clean Boot
This method will help to diagnose and fix any software-related conflicts that cause lagging, stuttering, and performance issues. Here is how you can do it:
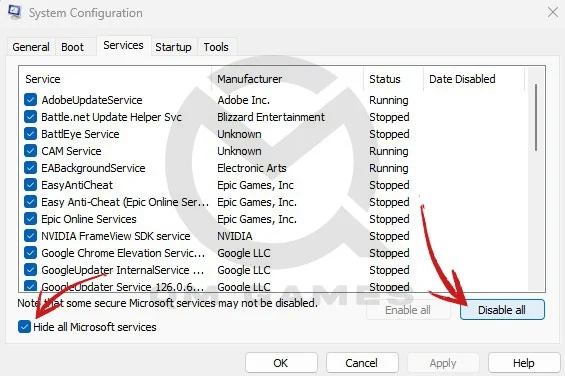
– Press Windows Key + R and type msconfig, hit Enter
– Go to the Services tab
– Check to Hide all Microsoft services
– Now, click Disable all
– Go to the Startup tab and click on Open Task Manager
– Disable one task at a time and restart the system.
12. Create Registry Backup and System Restore Point
Creating a registry backup and a system restore point is essential as it helps to maintain the stability and integrity of your OS. To do that:
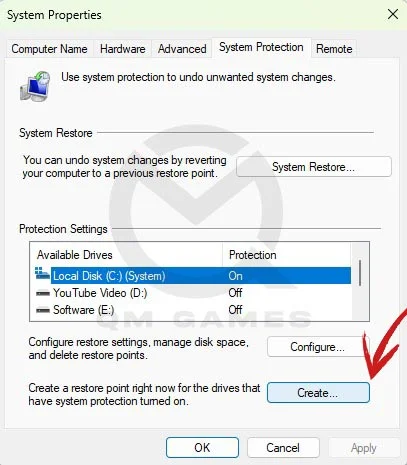
– Create a restore point: In the Windows Search type, Create a Restore Point, choose the OS Drive, and Click on Create.
– Use the Restore Point: To use, go to the Windows Search type, and Create a Restore Point. Then, click on System Restore and follow screen prompts.
13. Download our Custom FPS Pack
We have created a list of Registry Files that you can download from our Google Drive and double-click to install them. These files will bring specific changes to your registry that will fix the Destiny 2 lag and stuttering and boost the game’s FPS.
That’s all for this guide on how to fix Marvel Rivals lagging, stuttering, and low FPS issues.
