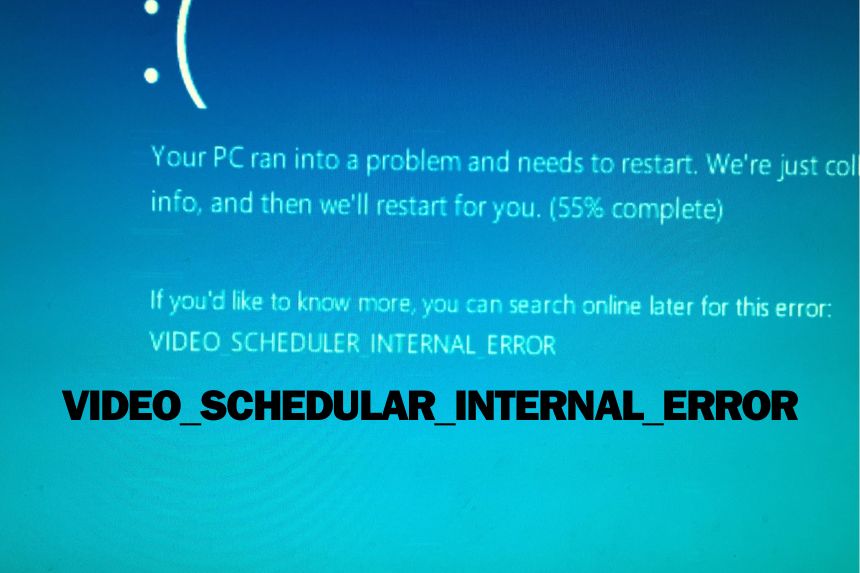
A persistent BSOD with the error Video Scheduler Internal Error can be much more than a simple nuisance. It can make working on your PC impossible and cause the loss of game progress and hours of work. If you have this issue, you need to fix it ASAP. But, due to the large number of variables that can cause the BSOD, it can be a cumbersome process. We have listed the best solutions that have worked for other Reddit users to fix the BSOD Video Scheduler Internal Error.
Remove and Reinstall the GPU Driver Using DDU
If you have recently started to notice the BSOD Video Scheduler Internal Error, it could be due to the GPU driver you have installed. Use the DDU (Display Driver Uninstaller) to remove the current driver completely and reboot the PC. Try getting the latest driver from the manufacturer’s website and install it. While installing the driver choose to perform a clean install. This should fix your problem if it occurred due to a corrupted driver.
Disable Hardware Accelerated GPU Scheduling
Few users have reported that disabling the hardware-accelerated GPU scheduling fixes the issue for them. This Windows feature allows you to increase the performance of games when enabled but has caused issues in many games. Here is how to disable the Hardware-Accelerated GPU Scheduling:
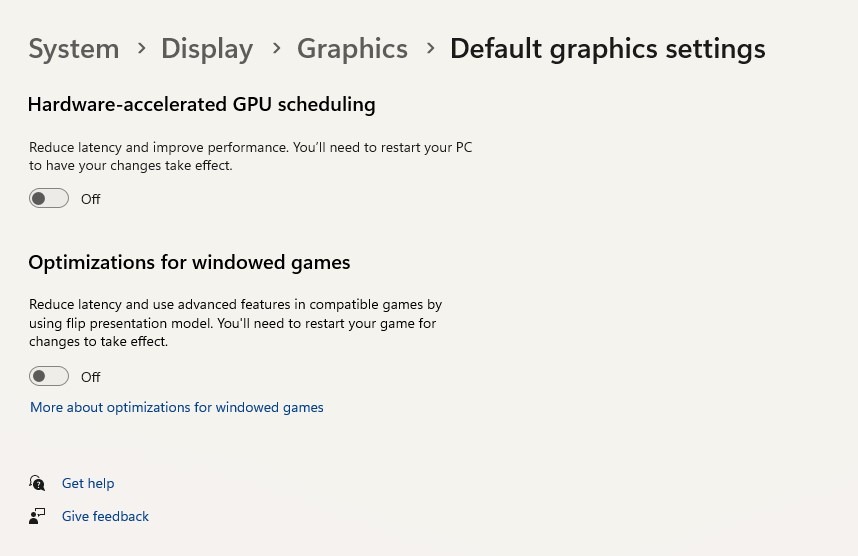
- Press Windows Key + I to open Settings
- Go to System > Display
- Click on Graphics in Related Settings
- Click on Change Default Graphics Settings
- Turn Off Hardware-accelerated GPU Scheduling
Switch the Browser
Many things can lead to the BSOD. One weird solution shared by a user was that he only got BSOD when using the Firefox browser to watch videos. Once he switched the browser and uninstalled Firefox that fixed the issue for him. This is a simple fix to try so give it a shot and with some luck your issue may be with the browser causing conflict with the GPU driver.
Update the BIOS
If updating the GPU driver did not fix your issue, another possible problem area could be the BIOS. Most people fail to update the BIOS for years and this can lead to many problems. The process to update the BIOS differs slightly depending on your Motherboard manufacturer or the laptop manufacturer. Go to the manufacturer’s website and download the latest BIOS software for your motherboard. Use the manual provided by the manufacturer to update the BIOS.
Check System Integrity and Repair
If there is a problem with the operating system such as missing or corrupted files that might be a very likely cause of the BSOD. Running a scan and repairing the OS can fix the problem. Here are the steps you can follow:
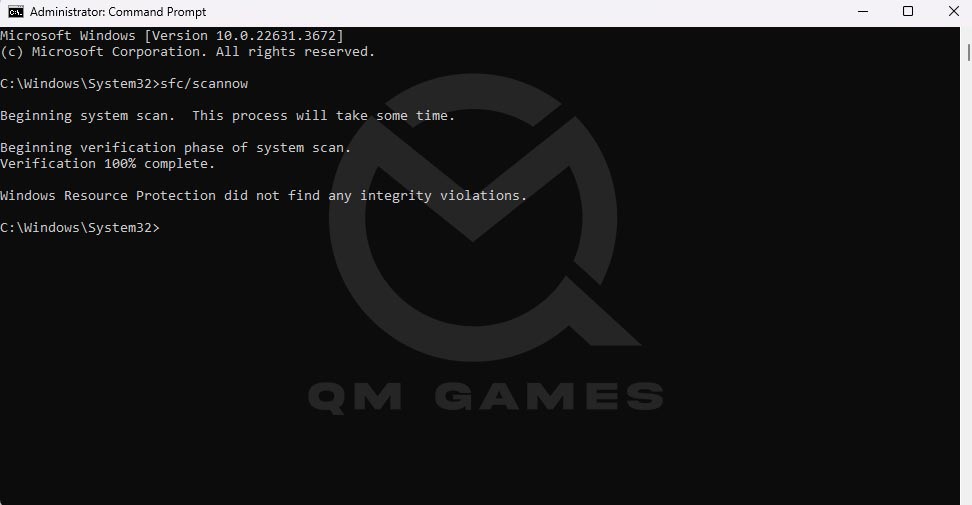
- In the Windows Search type CMD and choose to Run as Administrator
- Enter the below commands one at a time and hit Enter
chkdsk /csfc/scannowUpdate the OS
The next fix you can try is to update the operating system. New updates bring patches that can resolve bugs and issues in the existing build and possibly resolve the BSOD error. You can follow the below steps to update the OS.
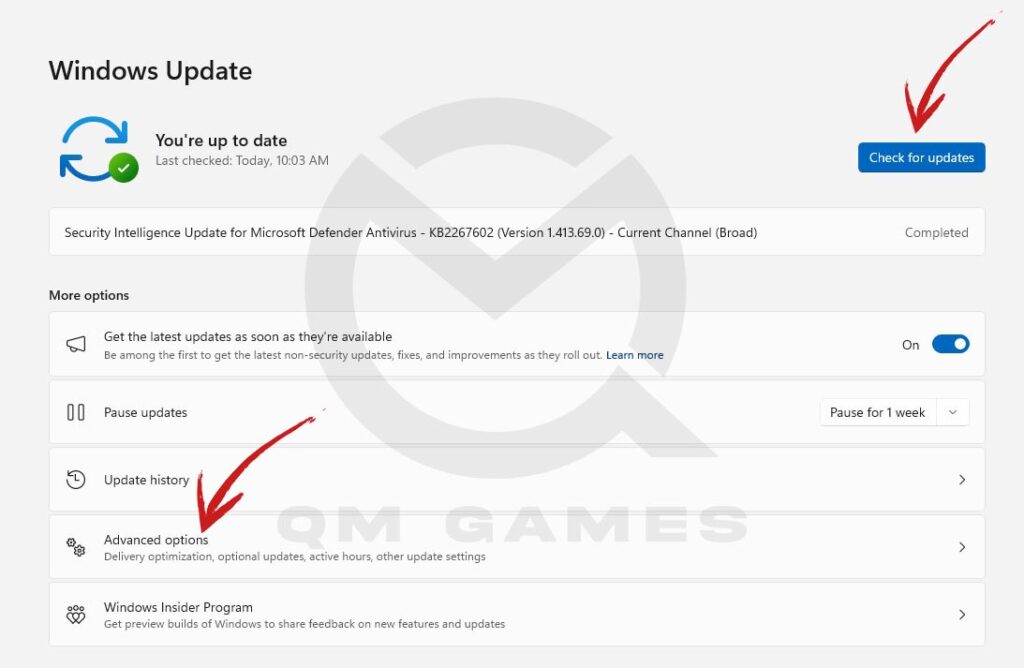
- Press Windows Key + I to open Settings
- Click on Windows Update
- Click on Check for Updates
- Download and Install all updates
- Next, click on Advanced options
- Under Additional options, click on Optional updates
- Install any available optional updates.
Did You Install a New Software or Application
Trackback to when you first got the error and if you installed any new software when this happened. Third-party software that conflicts with the operating system can cause critical operation failure leading to the BSOD Video Scheduler Internal Error. If you installed any new software, uninstall them and check if the BSOD still occurs.
Check System Requirements for the OS
Ensure that your PC meets the minimum requirements to install the operating system. While OS are not that resource-demanding, they do have their minimum specifications. You can check the system requirements for Win 11 on the link. Not meeting the system requirements can also lead to the BSOD error.
Check Hardware
If the graphics card or the other components are overheating that can also lead to the error. Remove the GPU, CPU, and RAM then clean the PC thoroughly. Ensure that the fans are working at optimum speed. Reconnect everything and check if the error still occurs.
Reset the PC
The next fix you can try is to reset the PC. The process takes some time and you can choose to keep your files or remove everything. Choose the option to keep your files and go through the screen prompts. Here is how to reset the PC.
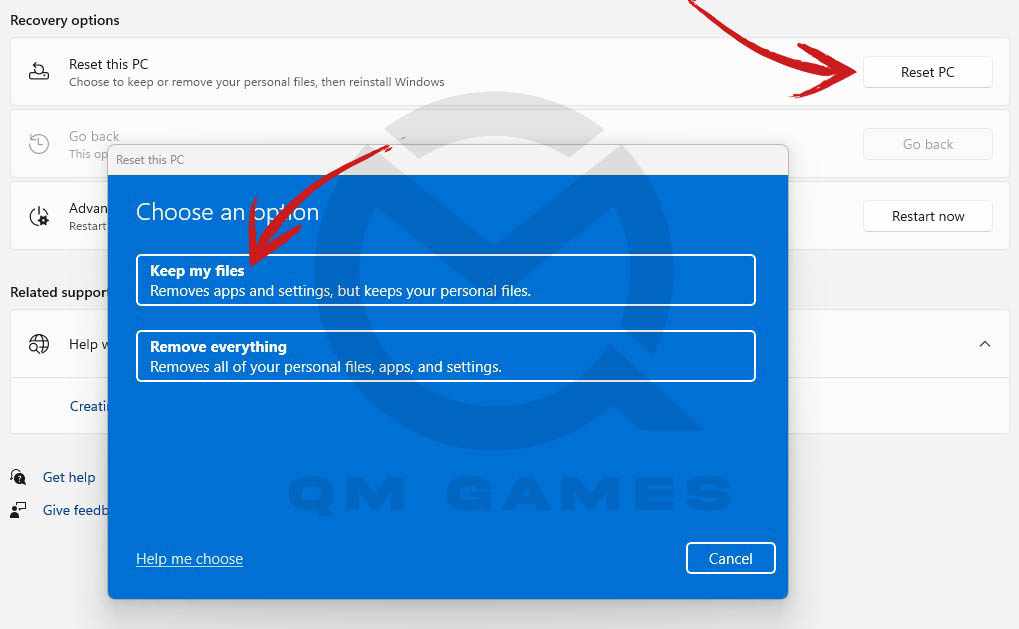
- In the Windows Search, type and click on Reset This PC
- Click on Reset PC
- Choose Keep My Files
Check for Faulty GPU
Finally, if none of the above solutions have worked, there may be an issue with the GPU. Try changing the GPU if you have a spare and see if the error occurs. If it does not, the GPU has a long warranty and you should get a replacement. Contact your GPU manufacturer if the issue is with the GPU.
