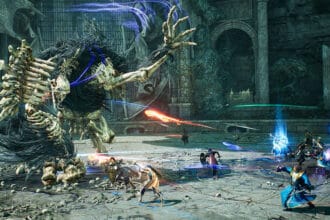
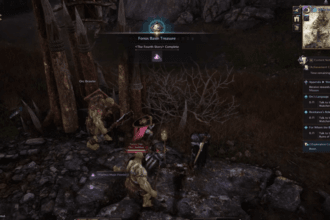
The Cursed Wasteland takes place in the Manawastes region of Stonegard, where you’ll face enemies found in the Open World Dungeon called the Sanctum of Desire. A notable feature of this dungeon is the glowing cracks in the ground that can stun you if you step on them. You’ll encounter these cracks while heading toward your objectives and during boss fights. Interestingly, this dungeon is one of the shortest because you can often bypass most mobs and take down bosses quickly before their mechanics activate.
Three Bosses in The Cursed Wasteland Dungeon
In the Cursed Wasteland Dungeon, you’ll need to defeat three bosses, Blath, Belog, and Shaikal, to finish it. This guide will provide a step-by-step walkthrough on how to beat the three bosses and win the rewards.
How to Beat Blath in The Cursed Wasteland Dungeon
Blath is the first boss you’ll face in the dungeon. This encounter is fairly straightforward, featuring just a couple of mechanics. When you get to his area, interact with the purple floating orb to summon two enemies: an Avolos Pyromancer and an Avolos Hydromancer. Defeat them, and then Blath will appear. He resembles a centaur and has the following mechanics:
- He makes a basic attack with his weapon on whoever has aggro.
- He’ll lift his weapon and, after a brief pause, release a ground AoE attack.
- He’ll pull your party closer and create a maze around the area. After a while, he’ll unleash a large AoE attack that can wipe out anyone inside the maze. To survive, you need to navigate your way out quickly. Just be careful because if you touch the light from the cracks, you’ll get stunned and likely die.
How to Beat the Belog The Cursed Wasteland Dungeon
Belog is similar to Blath. Interact with the purple floating orb to summon two enemies; an Avolos Aeromancer and an Avolos Geomancer. Defeat them to bring Belog into the fight. This boss has the following mechanics:
- He performs a basic attack with his weapon on the player who has aggro.
- He’ll lift his weapon and, after a moment, unleash a ground AoE attack right in front of him.
- He’ll pull your party in and divide the area into three squares. These squares are marked with the same light as other obstacles in the dungeon, so make sure to avoid them. Each side of the squares has a floating orb you can interact with. Activating the orbs will open up a path. Choose a side, interact with the orbs, and get out of the boxed-off area. If you don’t escape in time, the boss will unleash a wide AoE attack that could wipe your party.
How to Beat Shaikal, The Final Boss
Shaikal is the final boss of the Cursed Wasteland Dungeon in Throne and Liberty. This abomination has some deadly mechanics and significantly increases the difficulty of the dungeon. You’ll need to work closely with your party to survive his attacks. The area around Shaikal is divided into three sections. Touching the light that separates them will stun and damage you, and it can be deadly when the boss is using one of his mechanics. Before starting the fight, it’s a good idea to have your tank positioned in a different section from the rest of the party. Shaikal has the following mechanics:
- He’ll begin with a charged AoE attack that deals heavy damage, so make sure to block to avoid getting hurt.
- He targets the player with aggro with regular attacks.
- Shaikal will create ground AoE effects beneath random players. Move out of the AoE to avoid taking damage.
- He’ll mark a player with a red orb. After a short time, the orb will vanish, and a large ground AoE will pull in anyone nearby while dealing damage. The player marked with the orb should move to the back of the area, as far away from everyone else as possible. Once the orb disappears, quickly get away from that spot. After a moment, the ground AoE will activate and start pulling players in.
- Shaikal will target a player with a purple light. After a short time, he’ll unleash a purple liquid toward that player, tracking their movements. Anyone caught in this attack will be killed. The marked player should head to the edge of the area, interact with the barrier, and open it. Have another player open the barrier on the opposite side of that section to give you some room to move. Morph and head toward the open area to dodge the attack. Before the fight begins, make sure your group decides whether to move clockwise or counterclockwise.
