Wuthering Waves has finally launched on PC, but the game is going through a lot of issues as users are unable to play the game due to The UE4 Client Game Has Crashed and Low-Level Fatal Error. When you get this error, the first thing you should do is check if you are overclocking the GPU or the CPU. UE4 is bad at handling overclocks. Here are all the solutions you can try.
- Fix Wuthering Waves – The UE4 Client Game Has Crashed and Low Level Fatal Error
- Disable Overclocking – ASUS GPU TWEAK III, Afterburner
- Repair Game Files
- Allow the game through Firewall/Antivirus
- Disable Control Flow Guard
- Update the OS
- Set Correct Resolution Scale 100%
- Clean Install the GPU Drivers
- Install Microsoft Visual C++ Redistributable
- Disable the Less Powerful GPU (for laptop and two GPU users)
- Disable Fullscreen optimization & Provide Admin Permission
- Run the game in a clean boot environment
Fix Wuthering Waves – The UE4 Client Game Has Crashed and Low Level Fatal Error
The UE4 Client Game Has Crashed in Wuthering Waves is a common error in games developed using the Unreal Engine 4. Fortunately, the error is so well known that there are proven fixes. Here is everything you can try to fix the error.
Disable Overclocking – ASUS GPU TWEAK III, Afterburner
To fix the error, the first solution you should try is to disable all overclocks. Overclocking the CPU or the GPU contributes to the UE4 fatal error crash. You should also close all RGB and Overclocking software such as Tweak 3, Afterburner, etc.
Repair Game Files
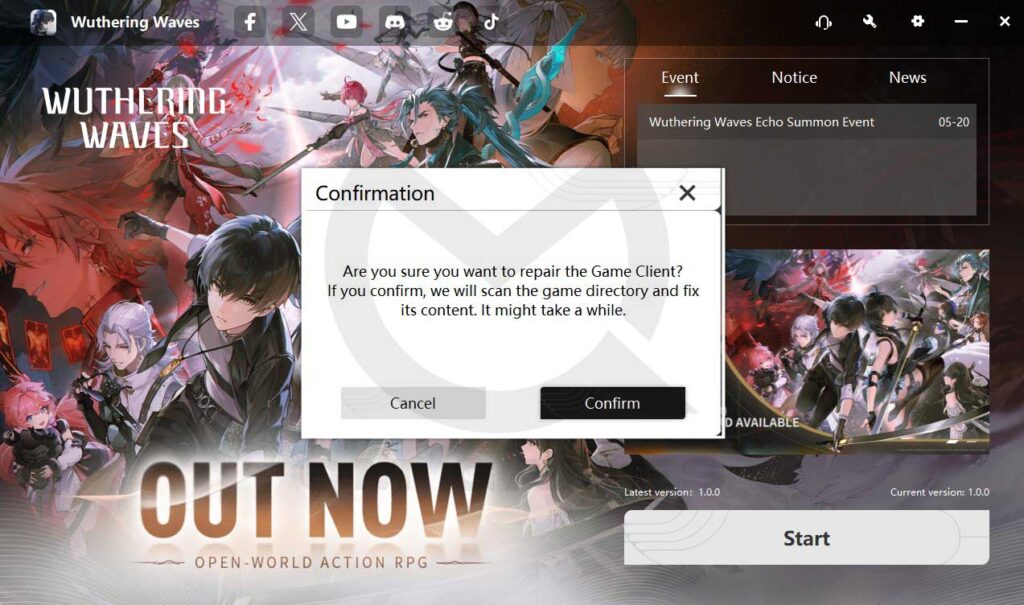
The next fix you should try is to repair the game files. However; currently, there seems to be a bug with the verification process as it gets stuck at 0.00%. Don’t worry though, the verification runs in the background and should be completed in less than 30 minutes. To verify the game files, click on the wrench icon in the launcher and choose to verify.
Allow the game through Firewall/Antivirus
One of the most important fixes that can resolve a lot of errors in the game including the Client-Win64-Shipping.exe Application Error is to allow the game through the antivirus or the Windows Firewall. We have a guide that shows the steps for all antivirus programs and firewalls. Click on the link for steps.
Disable Control Flow Guard
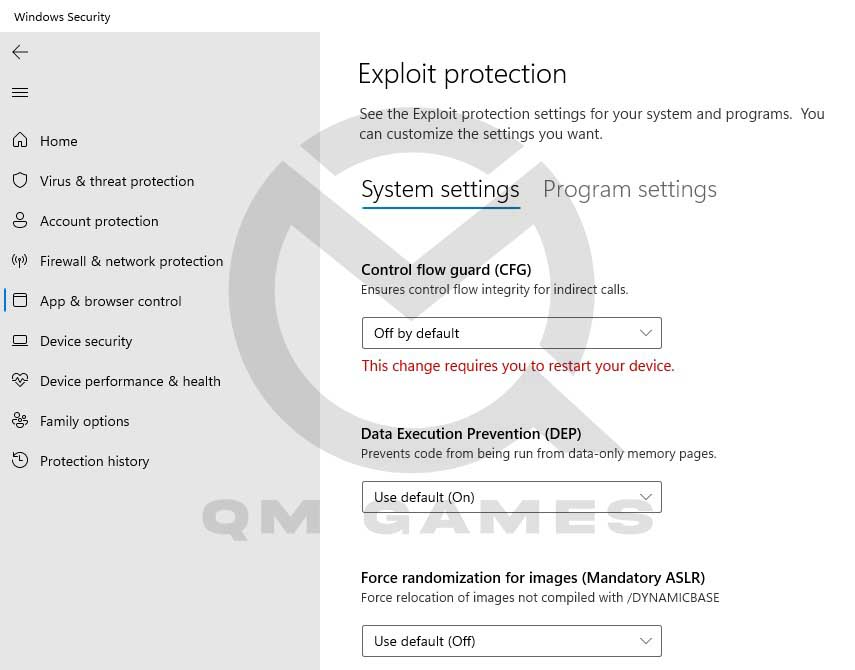
- Press Windows Key + I to go to Settings
- Go to Privacy & Security > Windows Security > Apps and Browser Control
- Under Exploit Protection, click on Exploit Protection Settings
- Choose Off by Default
Update the OS
The next fix is to update the OS. While updating the OS, ensure to check for additional updates as well. Downlaod and install all the available updates to fix the Fix Wuthering Waves – The UE4 Client Game Has Crashed and Low Level Fatal Error.
Set Correct Resolution Scale 100%

- Press Windows Key + I to go to Settings
- Click on System > Display
- Set the Scale to 100%
Clean Install the GPU Drivers
The next fix is to perform a clean install of the GPU drivers. Go to the official AMD or the NVIDIA website and download the latest GPU driver. While installing the driver, choose Custom Install and then check the field for Perform a clean install.
Install Microsoft Visual C++ Redistributable
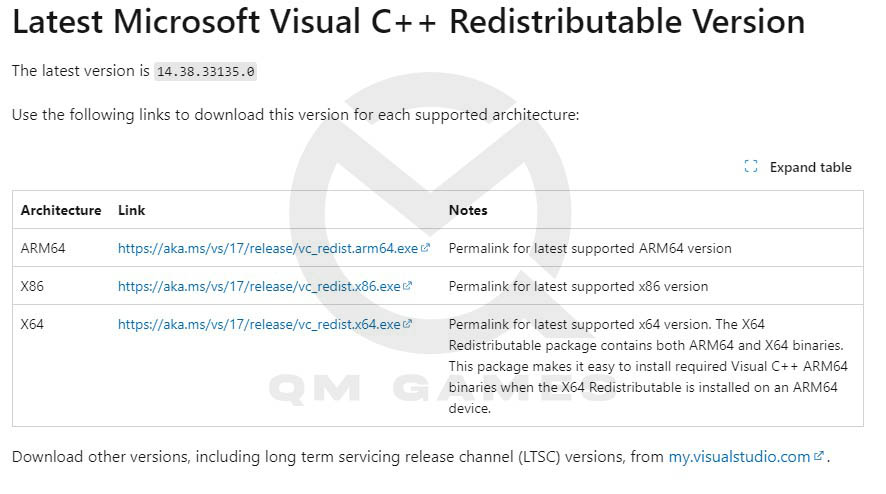
Go to the official MS website and download the latest version of the Microsoft Visual C++ Redistributable and install them. Ensure that you download both the x86 and x64 versions. Here is the link to the official MS website for Microsoft Visual C++ Redistributable.
Disable the Less Powerful GPU (for laptop and two GPU users)
If you have two GPUs installed or you have a gaming laptop with two GPUs, ensure that the less powerful GPU is disabled. Here are the steps you can follow.
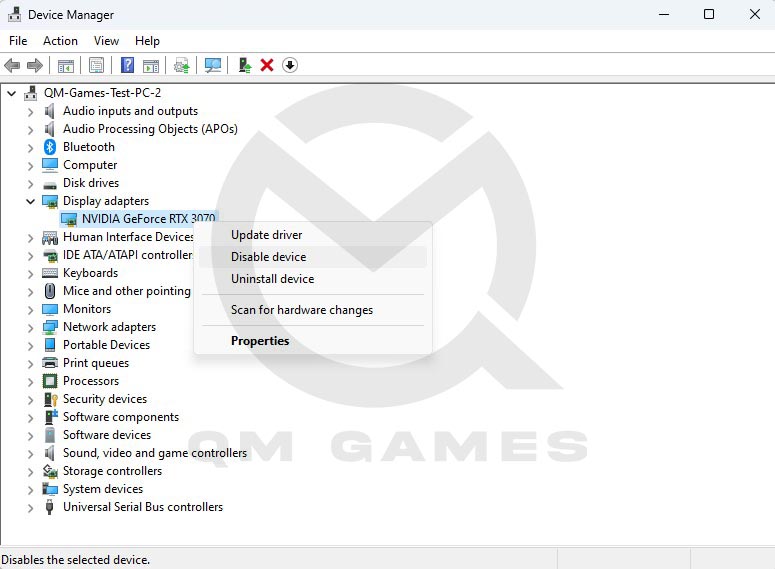
- Press Windows Key + X and choose Device Manager
- Under Display Adapter, right-click on the less powerful GPU and choose Disable Device
Disable Fullscreen optimization & Provide Admin Permission
To perform this fix, go to the install location of the game. The default location should be C:\Wuthering Waves\launcher.exe. Once you locate the executable, here are the steps you can follow.

- Right-click on the launcher and choose Properties
- Go to the Compatibility tab
- Check Disable Fullscreen Optimization and Run this program as an administrator.
Run the game in a clean boot environment
A clean boot environment ensures no background or third-party application interfers with the game. Here are the steps you need to follow.
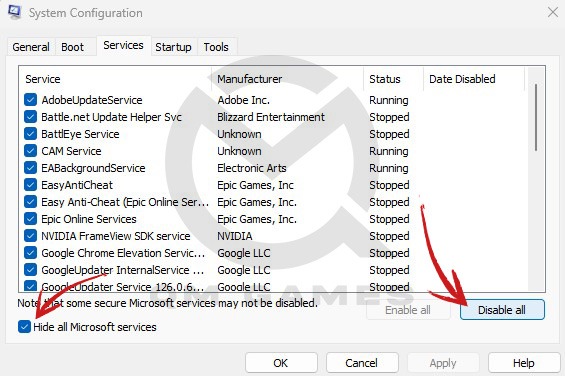
- In the Windows Search, type Run and open it
- Write msconfig and hit Enter
- Go to the Services tab and check Hide All Microsoft Services
- Now, click on Disable All
- Go to the Startup tab and open Task Manager
- Disable all startup tasks, one at a time
- Reboot the PC.


