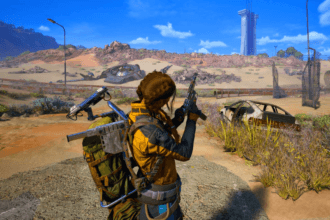
Season 2 of ARC Raiders expanded PvE challenges while also increasing the player base significantly. Selecting a loadout that best suits your playstyle will significantly increase your chances of surviving, doing well, and having the confidence to raid successfully. This guide breaks down practical builds for Season 2 that can be used on a budget as well as high-end flexible builds that can adapt to both Arcs and unpredictable PvP situations.
Overview
In Season 2 of ARC Raiders, there are a ton of new players joining the game. If your primary focus is Player vs Environment (PvE), then a solid loadout will make all encounters much easier to manage. This build focuses on defeating all Arcs first, but also allows you to have adequate protection if you run into an unexpected player encounter. You will not need perfect gear for these builds, as they progressively become better as you unlock the ability to craft better gear.
In general, most high-tier weapons will outperform lower-tier weapons, so you should upgrade as soon as you can, attach your highest-level attachments when they are available, and try to keep all enemies at a distance, as close-quarters fights are especially risky with limited gear.
Budget Loadout (Early Game)
Creating a cheap loadout that performs adequately in nearly all circumstances with minimal loss upon death, the Ferro IV remains an excellent primary weapon for PvE, at long-range. It is recommended to use this weapon with a Muzzle Brake I, Vertical Grip I and a Stable Stock to help control recoil during firing. For close-range targets you can use the Kettle IV as an excellent backup for clearing ticks, pops, fireballs or any foes that come in too close for comfort.
For optimum effectiveness the Kettle should be used with a Compensator, an Extended Light Mag, an Angled Grip, and a Stable Stock. For ammo, there should be at least 40-60 heavy rounds, about 150 light rounds and more if needed for improving aim. For survivability and to progress through the game, use the Looting MK. 1 and equip a light shield, since early game loots are worth more than simply having a high hit pool.
Carry at least five Bandages (switching to herbal when it’s available), five Shield Rechargers and five Adrenaline Shots; Adrenaline Shot is particularly beneficial for repositioning yourself, escaping unfavourable battles and getting to loot areas quickly. In the beginning stages, ammo is limited, so collect all you can locate. Also, focus on improving your explosive crafting station, as Snap Blasts provide you with the first consistent source of explosives.
Ready-for-Anything Loadout
This loadout has high cost versatility of use with the Weapon Renegade IV as your main weapon. If you plan on using it more frequently you can equip it with a Silencer otherwise equip it with a Muzzle Brake for most situations. Enhance reliability with an Extended Medium Magazine and Stable Stock. If you like to fight at close range or do indoor clearance bring your Stitcher equipped with a Compensator, Horizontal Grip, Extended Light Magazine and Lightweight Stock.
Since the Renegade struggles against larger Arcs, keeping an Anvil in reserve is a smart backup. Ammo demands are higher with this setup, so plan for around 120 medium rounds, 150 light rounds, and 40 heavy rounds to stay effective throughout a run.
Looting Mk. 3 (Survivor) is the ideal augment here, offering high carry capacity, multiple safe pockets, health regeneration while downed, and support for a Medium Shield, which is especially valuable for solo players fighting tougher Arcs. Bring extra Herbal Bandages, plenty of Adrenaline Shots, and a Defibrillator, using Safe Pockets for key cards or utility items. Explosives round out the build, with Trailblazers, Heavy Fuze Grenades, Showstoppers, and Trigger ‘Nades giving you tools to handle almost any enemy you encounter.
Long-Range PvE Loadout
This build is designed for open maps and trials, where long sightlines and flying Arcs are the main threat. The Anvil remains your primary weapon since it covers most encounters and still gives you some protection in PvP situations. As with the other setups, a Compensator is the best attachment choice to keep it stable.
The Osprey II is what defines this loadout. It allows you to engage enemies from extreme range, pulling and killing flying Arcs safely before they ever reach you. With enough medium ammo, it can even deal with larger Arcs from a distance. Run it with an Extended Medium Mag, Extended Barrel, and a Stable Stock, and bring around 40–60 heavy rounds with 80–120 medium rounds, adding more if the Osprey will be your main damage source.
For your augment, use Tactical Mk. 2. This build isn’t focused on loot, but the Medium Shield and automatic smoke trigger when your shield breaks can be lifesavers, giving you a brief window to reposition. Stick with Herbal Bandages, Shield r
Rechargers, Adrenaline Shots, and one Shaker for quick use, and use your single safe pocket for key cards. Explosives should stay simple with Showstoppers, Trigger ‘Nades, and a couple of Wolfpacks, skipping Trailblazers since most fights happen at range.
Well-Rounded Farming Loadout
It is an upgrade over the early versions that allows you not only to effectively complete normal loot runs at a reduced cost, but it also offers an option to take down your opponent should they choose to engage with you up close. You have to become comfortable with the Anvil IV before using it with most of the higher-tier weapons. Using the Compensators as an attachment can be really beneficial, especially with the higher-tier versions.
Players should preferably utilize either the Kettle or the Stitcher when using their second weapon, depending upon personal preferences. It is advisable to have a Silencer while using the Anvil because the weapon produces a loud noise. Players can effectively eliminate enemies without attracting undue attention by using it. Carry approximately 40–60 heavy rounds and no less than 150 light rounds.
Looting Mk. 2 is the best augment at this stage, offering good storage, two safe pockets, and automatic tick removal. The forced light shield isn’t much of a downside for farming. Carry Herbal Bandages, Shield Rechargers, Adrenaline Shots, and a Recorder. If you have room, add a Defibrillator for safer runs or a snapbook for extra mobility, along with explosives like Trailblazers, Showstoppers, or Trigger ‘Nades.
Conclusion: Most of the time, it’s best to enter a raid knowing what you want to do. That said, good loadouts give you room to adapt when things go wrong. Start with cheaper builds, learn enemy weak spots, and slowly move into higher-risk setups as your crafting improves.