To unlock the Blundergat and upgrade it to the Sundergat in Black Ops Zombies 7, you’ll require both exploration and timing. As you collect all of the necessary parts spread out across the various versions of the map, you will also have to finish the specific upgrade, this guide walks you through each step needed to obtain this powerful weapon.
Unlocking Pack-a-Punch and Getting the Stock
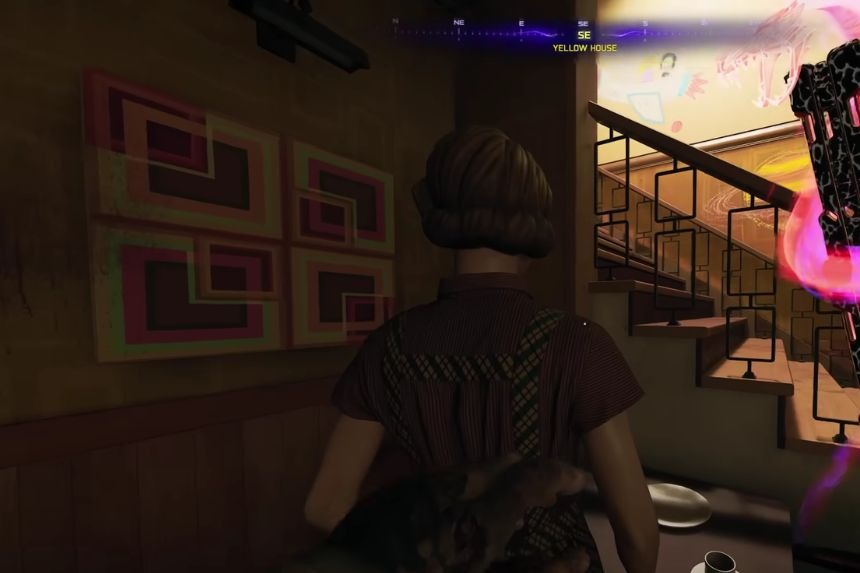
Unlocking the Pack-a-Punch is the first step in acquiring the stock. First, you must find the truck keys while in the backyard of the yellow house in the nuked version of Nuke Town. After a Rad Hound round ends, you’ll be automatically transported to the past.
Next, you need to use these keys to move the truck that blocks the access to the houses. Once you have done this you will then be able to shoot all the orbs in order to activate the Pack-a-Punch. Once activated, you must then return to present day and search for the bloody wall markings. The markings may appear in the garage of the yellow house, in the greenhouse at the top of the stairs, or along Trinity Avenue.
When you return to the past, the bloody wall markings will have disappeared. However, you will be able to destroy the walls with explosives. After you destroy the walls, you will be able to return to the present day again and search the same locations. At least one of these locations will then reveal the stock.
Collecting the Remaining Blundergat Parts
You will receive the barrel by interacting with the reward spores in the nuked version of Nuke Town. You may begin to fill barrels within the early rounds, but the drop is random. You will have to interact with spores during the match and one of them will eventually reward you with the barrel.
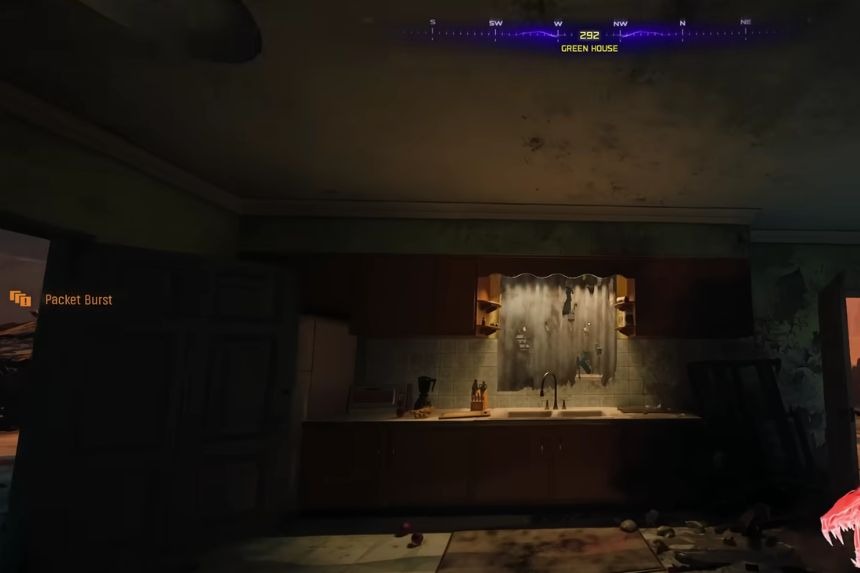
To get the hammer, pick up the vial from the second floor of the yellow house in the nuked version and fill it with acid in the greenhouse kitchen. After that, take the filled vial back to the past where you can use it on mannequin heads to receive rewards. However, since the correct mannequin head is also random, you may have to repeat this process multiple times. You can use three vials on mannequin heads one after the other before you go back to the kitchen, and refill the vial.

The sealant is located in the good version of Nuke Town. You can find the sealant in the yellow house bedroom, by checking inside the bookcase that is near the window.
Crafting the Blundergat
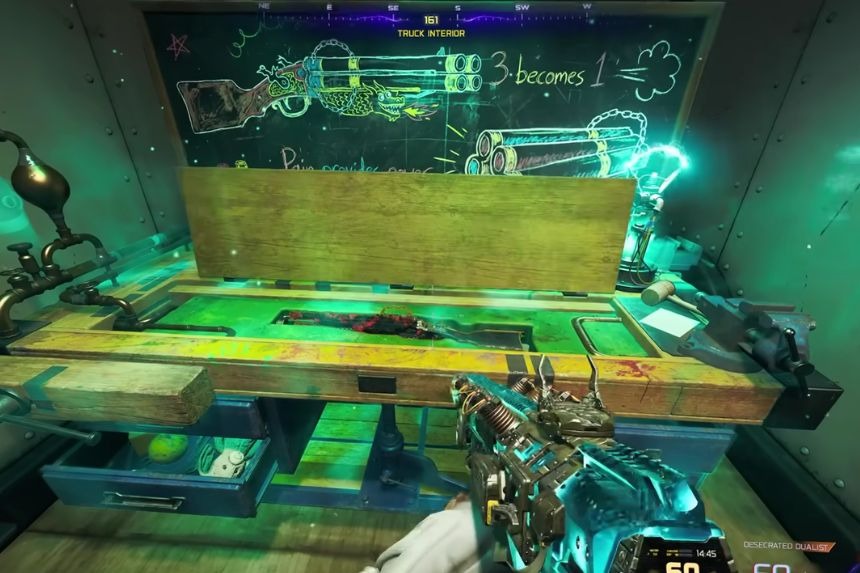
After collecting all parts (stock, barrel, hammer, and sealant) you can now go back to the Nuke Town (the nuked version). When you arrive at Nuke Town, you will find the truck in the center of the map. You can melee the workbench with your knife to bring together the Blundergat on the workbench using a crafting station.
Upgrading to the Sundergat
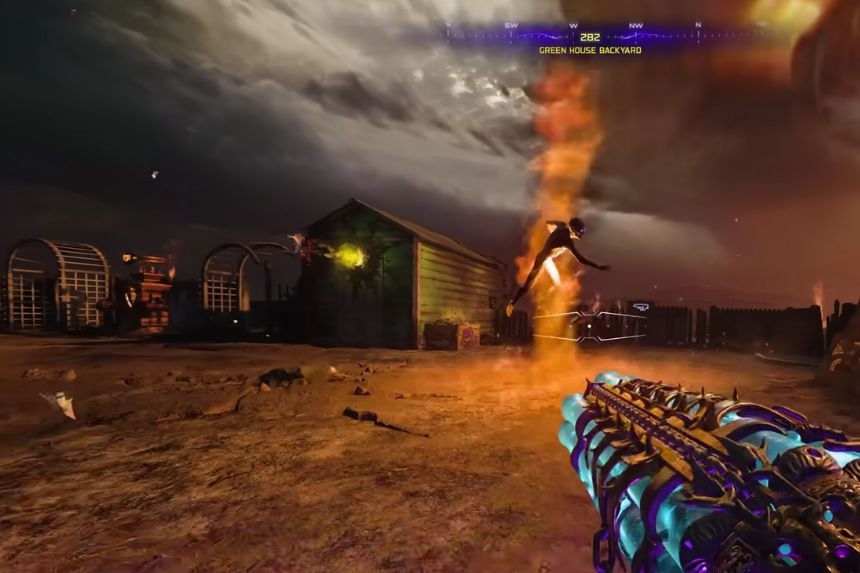
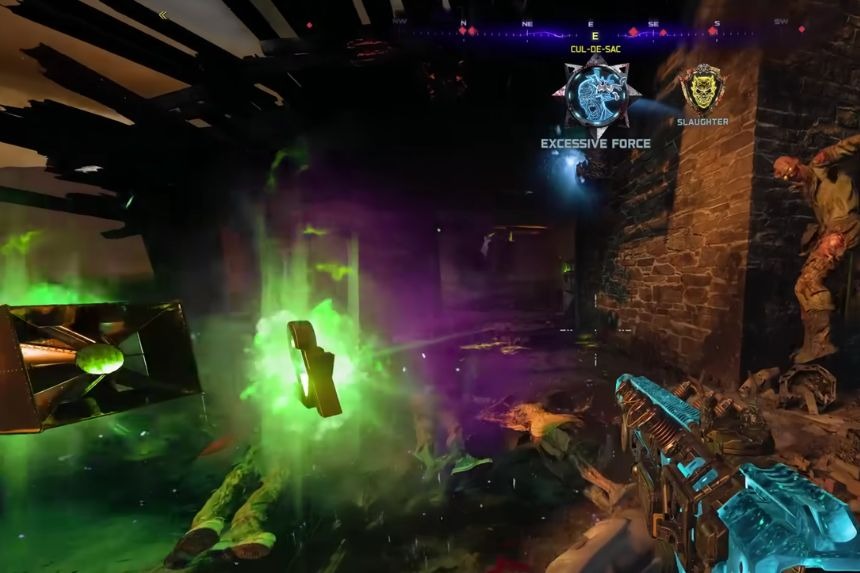
After crafting the Blundergat, the upgrade process begins at the start of each round in the nuked version of Nuke Town. A fire tornado will spawn either in one of the backyards or along Trinity Avenue, with a zombie trapped inside it.
Approach the tornado to release the zombie. It will glow blue and begin following you. Your goal is to lead it to the truck in the center of the map and kill it near the upgrade table. Since the zombie can take damage from other enemies or spores, it’s best to attempt this near the end of a round and guide it through safer paths like inside houses.
Only one tornado appears per round, so you’ll need to repeat this process. On the third round, a mimic will spawn instead of a zombie, but the method remains the same, lead it to the table and kill it there.
After completing all three, the table will glow with blue spectral energy. Travel to the past, melee the table, and place the Blundergat inside. When you return to the present, the upgraded Sundergat will be ready for you to pick up.